Want to know something cool?
LinkedIn – the social media network you’ve been ignoring – now has over 740 million members.
It doesn’t matter if you’re completely new to the platform or have a stagnant account with zero activity.
If you’re a blogger and you’re not using LinkedIn to get blog traffic, you’re missing out big time.
Let’s change that today.
Table Of Contents
- 1. What is LinkedIn used for?
- 2. Complete your professional profile
- 3. Create a company page for your blog
- 4. Write a compelling overview
- 5. Get those invitations out
- 6. Showcase your skills and get endorsements
- 7. Feature your accomplishments
- 8. Take skill quizzes
- 9. Feature your latest blog posts
- 10. Join LinkedIn groups
- 11. Publish original articles
- 12. Automate your posts on LinkedIn
- 13. Send content updates via the messaging tool
- 14. Additional LinkedIn marketing tips
- 15. Conclusion
What is LinkedIn used for?
For absolute beginners, allow me to start by addressing an important question:
What is LinkedIn used for, anyway?
Simple: professional networking.
Think of LinkedIn as a social media network – just like Facebook and Twitter.
But rather than connecting with friends and relatives, you’re connecting with workmates, prospects, industry leaders, and people with valuable connections.
If you run a business, you can use LinkedIn to look for potential hires, as well.
I actually mentioned LinkedIn as one of the best places to hire blog content writers. You can also find talented website developers, graphic designers, editors, SEO consultants – you name it.
Most importantly, LinkedIn offers a great platform for building authority in your industry.
And, if there’s one thing you know about me, I’m all about that authority.

This ties in with the LinkedIn traffic generation strategies we’ll talk about today.
Remember, the more authoritative and popular you are, the more people are going to click your posts. And, on LinkedIn, expect to get boatloads of traffic and high-quality leads, especially if you run a B2B blog.
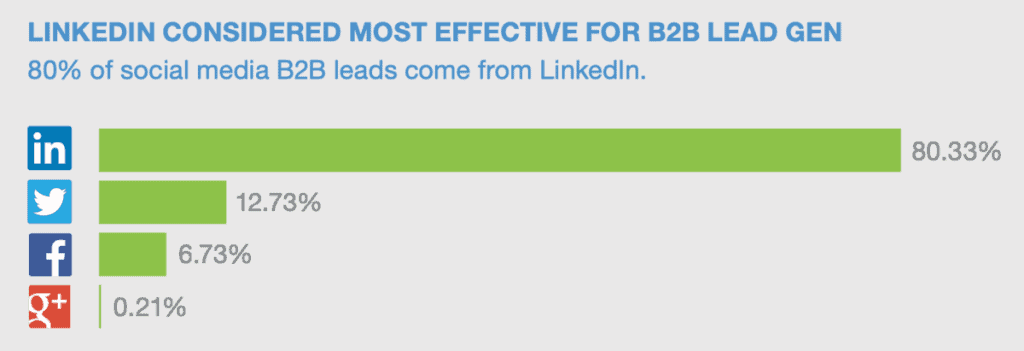
Statistics show that half of all social traffic coming to B2B blogs and websites are from LinkedIn.

LinkedIn is also responsible for over 80 percent of all social media leads to B2B brands.
In case you didn’t know, B2B is short for business-to-business. This encompasses all businesses, including blogs, that provide products and services to other businesses.
Blogs that target professionals, entrepreneurs, and students, should also benefit greatly from LinkedIn lead generation.
Remember, unlike users on Facebook, Twitter, and Instagram, LinkedIn users come to the site to learn.
They’re not particularly interested in gossiping, dating, “memeing,” or looking at photos.
They want to learn, grow, and ultimately profit.
That’s why LinkedIn users are more likely to respond positively to content with:
- Practical and actionable advice
- Expert insights based on experience
- Step-by-step tutorials
- Updated and reliable statistics
- Brand storytelling elements
What’s that – you have content like that gathering virtual dust on your blog?
Here’s how you can bring them some traffic through LinkedIn:
1. Complete your professional profile
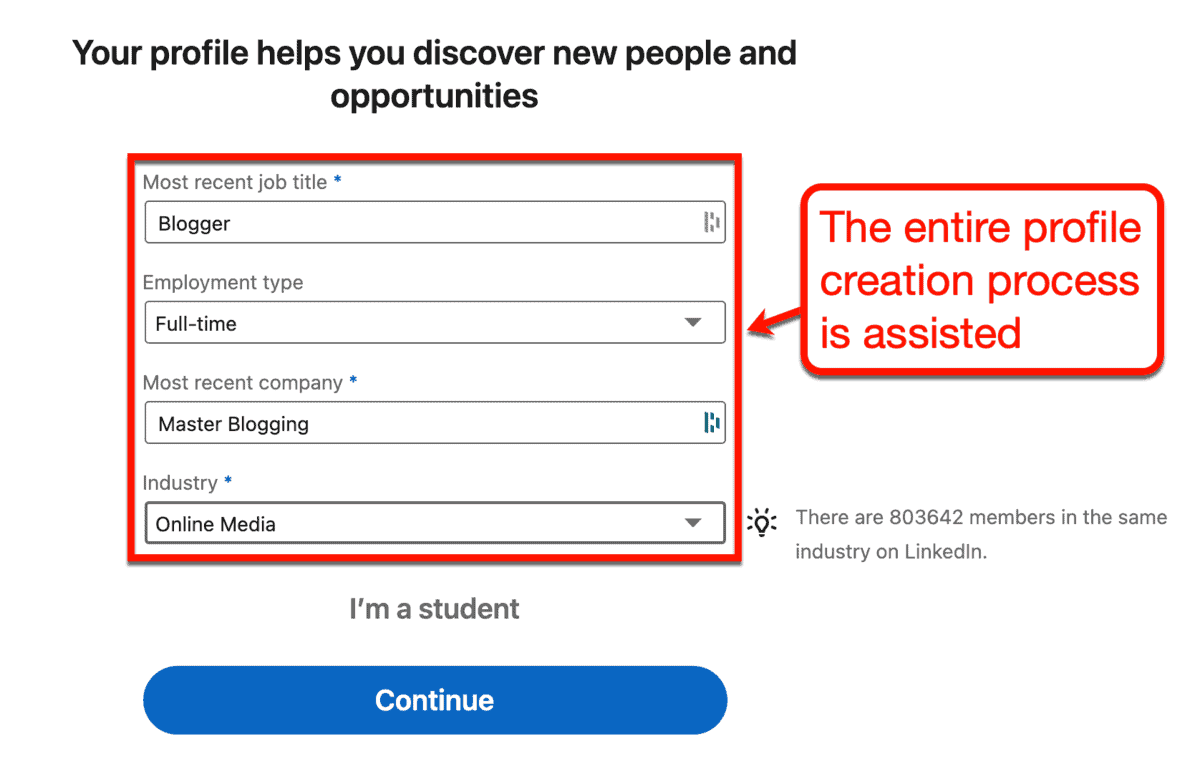
As with every other social media network, the first order of business in LinkedIn is completing your profile.
Fortunately, this is an assisted process that should only take a few minutes to complete.
At one point during profile creation, LinkedIn will also show you dozens of potential connections.
They do this to make sure your LinkedIn experience will have a running start.

To get your profile off the ground, just follow the on-screen instructions and provide the required information.
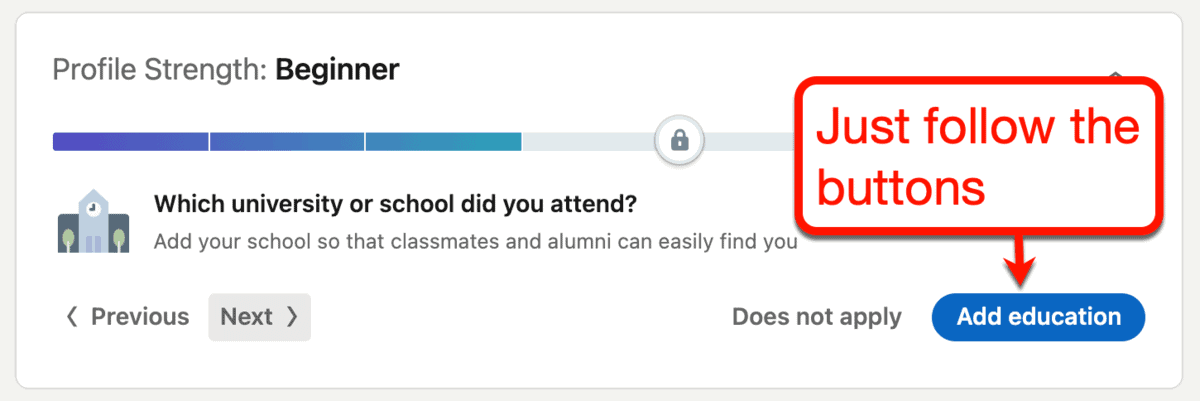
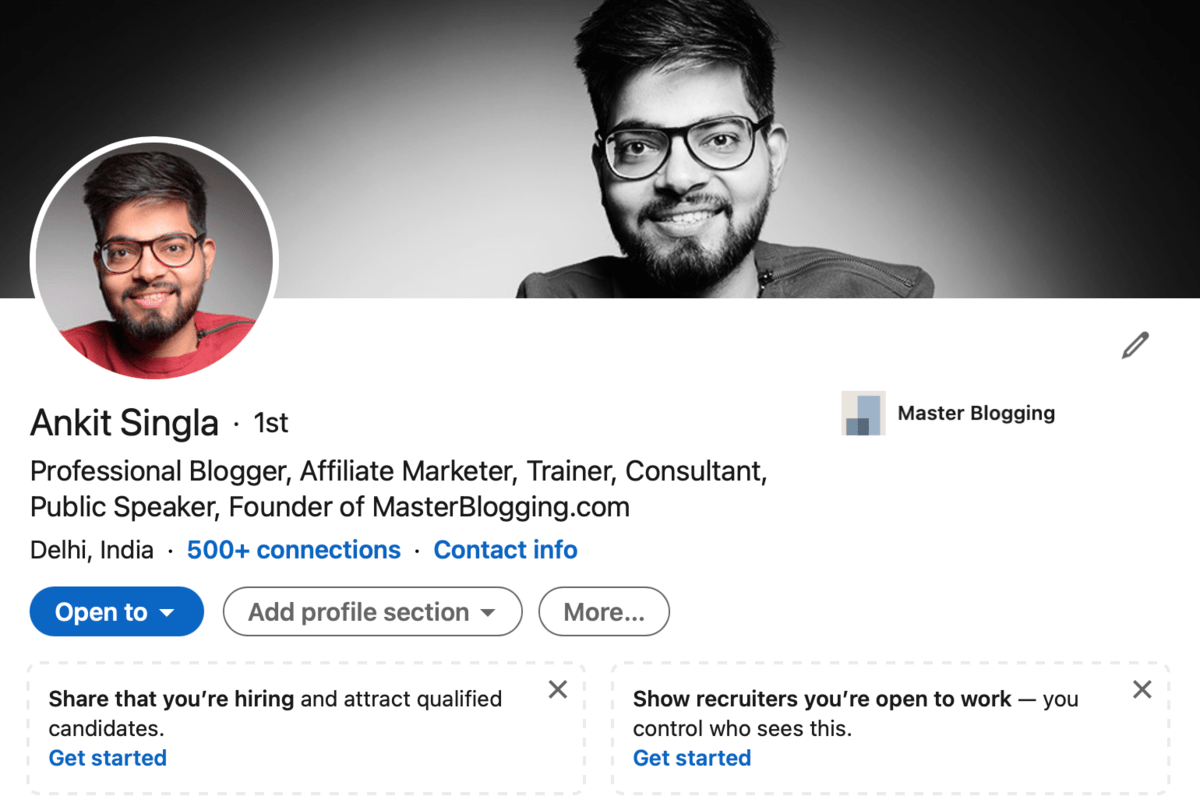
As soon as you’re done, visit your profile to check your “Profile Strength” rating. You’ll also see the additional steps you need to take to complete your profile.
Don’t worry – LinkedIn is nice enough to include buttons that will take you exactly where you need to be.
Just remember to build your profile for the professional crowd.
Here are a few tips:
- Use the clearest and most professional photo you can find
- Use a professional background photo
- Write a summary that briefly describes what you do
- Add your updated business contact information
- Don’t forget to mention your blog
It may sound like a lot of work, but building your LinkedIn profile can be really fun.
Think I’m lying?
I had so much fun with LinkedIn, I actually posted the same smile twice.
Just remember that, for the sake of this guide, I’ll be demonstrating certain steps using a dummy account.
You can follow my real LinkedIn profile by checking out this link.
2. Create a company page for your blog
After building your LinkedIn profile for the first time, you may notice one thing immediately:
Your blog doesn’t have an official company page yet.
A company page on LinkedIn allows you to build a branded content distribution channel. It also helps make your brand more recognizable, credible, and overall authoritative on the platform.
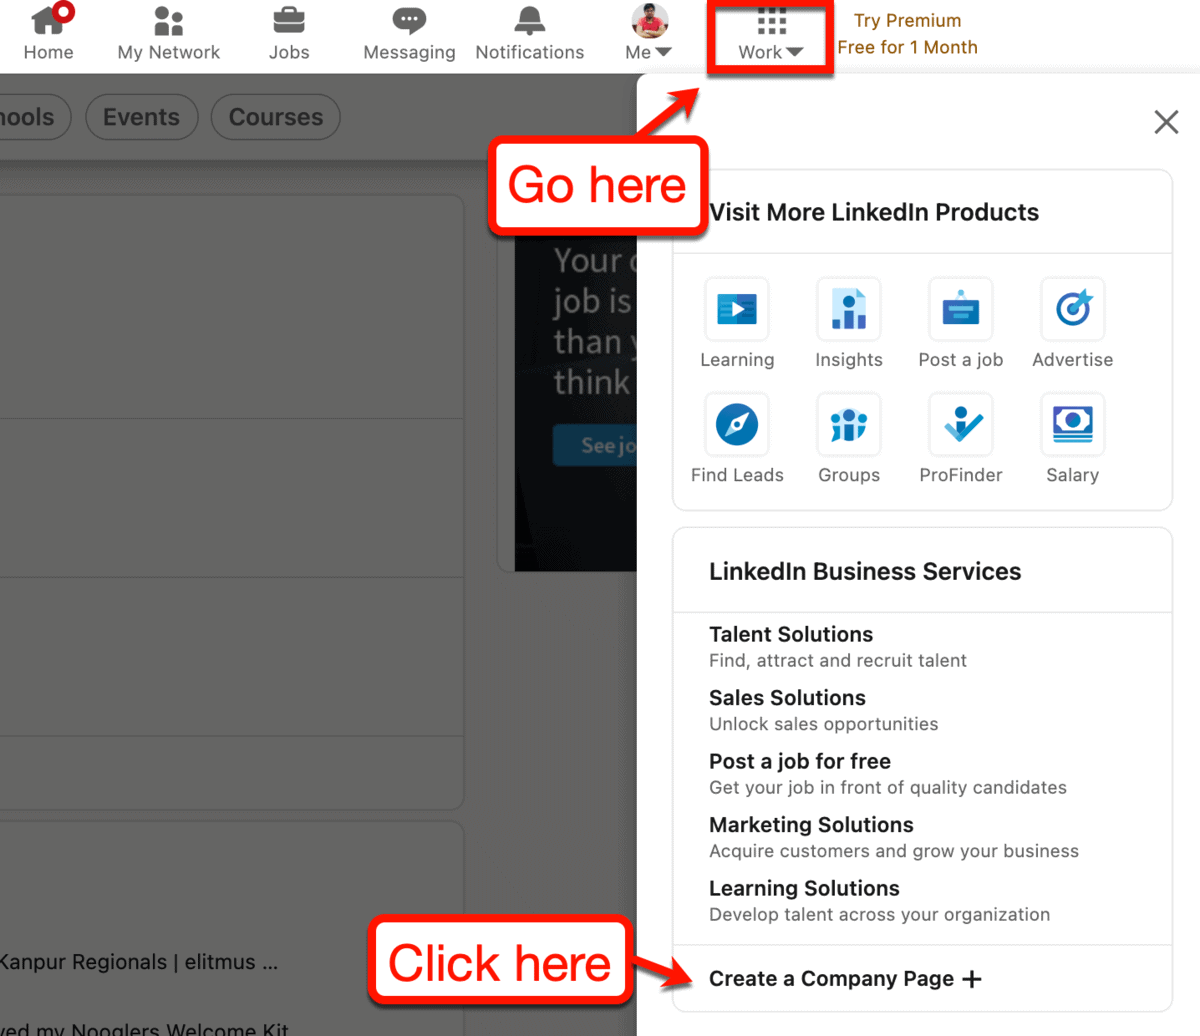
To build a company page, select the ‘Work’ menu on the upper-right corner of the LinkedIn interface. From there, click ‘Create a Company Page.’
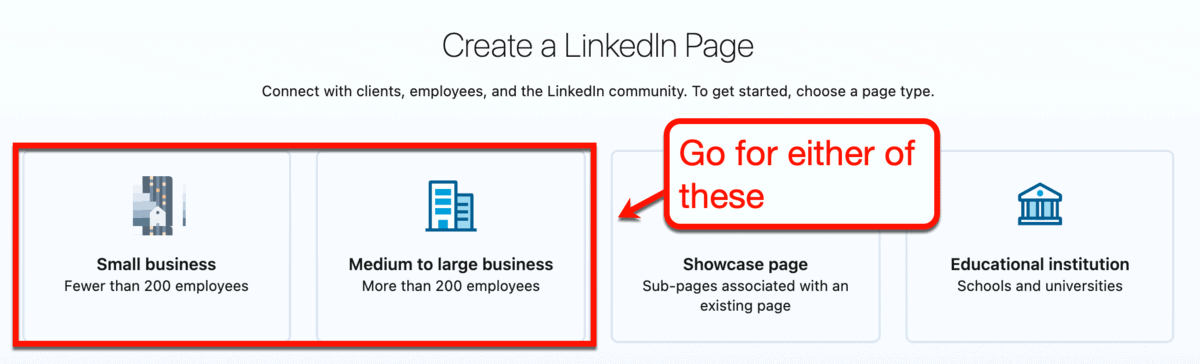
You’ll then be asked to specify the type of company page you want to build.
Depending on the size of your blog, I suggest going for either ‘Small business’ or ‘Medium to large business.’ Unless, of course, you’re actually building a blog for an educational institution.
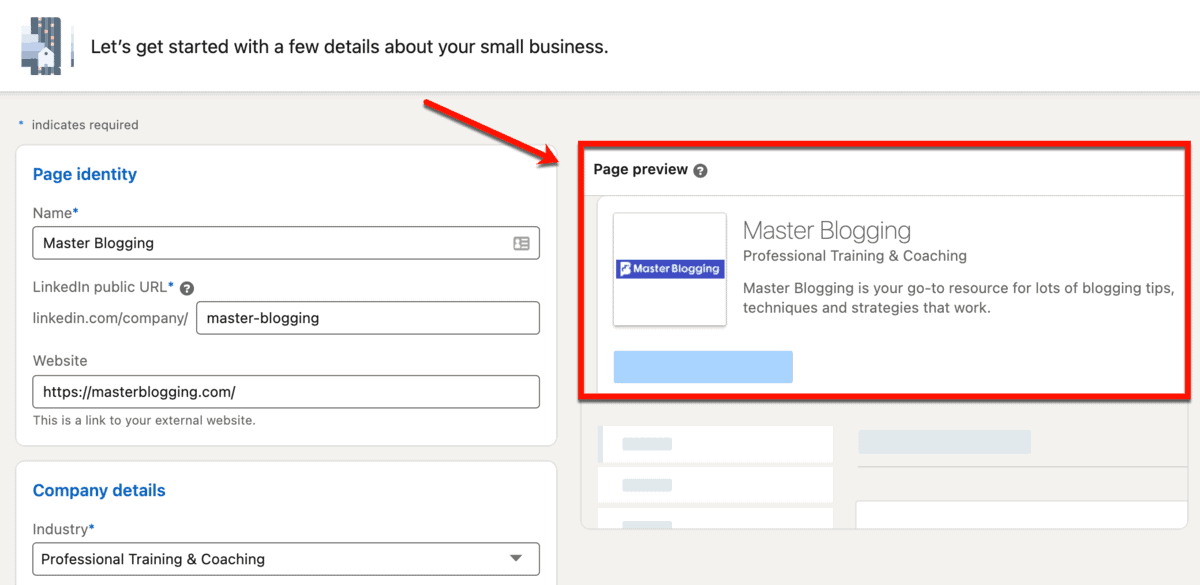
You can finish up your company page by filling in the required details.
Some of the important information you should include are your:
- Blog’s domain address
- Desired LinkedIn public URL slug
- Industry
- Logo
- Tagline
A preview of your page should appear to the right of the required fields. Use it to see if you’ll be perfectly happy with what you’ll get.
You can draw inspiration from the company pages of websites like Content Marketing Institute.
First and foremost, take a look at their tagline.
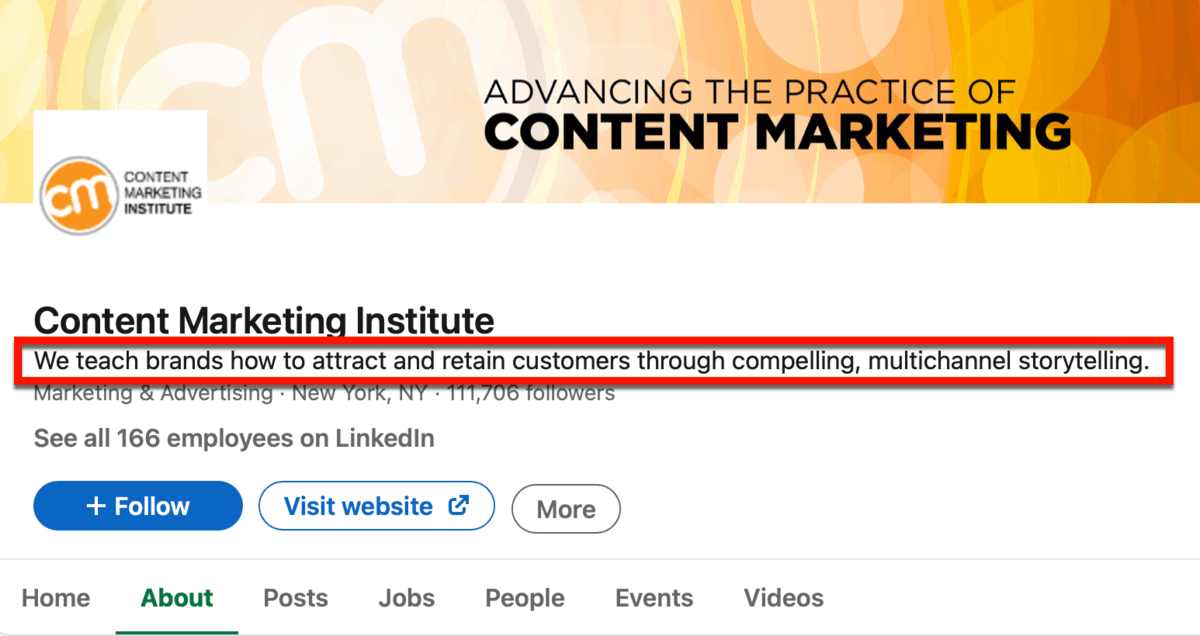
See how clear, concise, and powerful it reads?
You need to create something similar in order to be seen as a serious, authoritative brand in your niche.
Of course, you shouldn’t forget about your company page’s background photo.
Don’t waste space by using a generic, royalty-free image you just grabbed from who knows where. Instead, create a custom image with another tagline.
Apart from Content Marketing Institute’s page above, here’s another example from The Content Advisory:
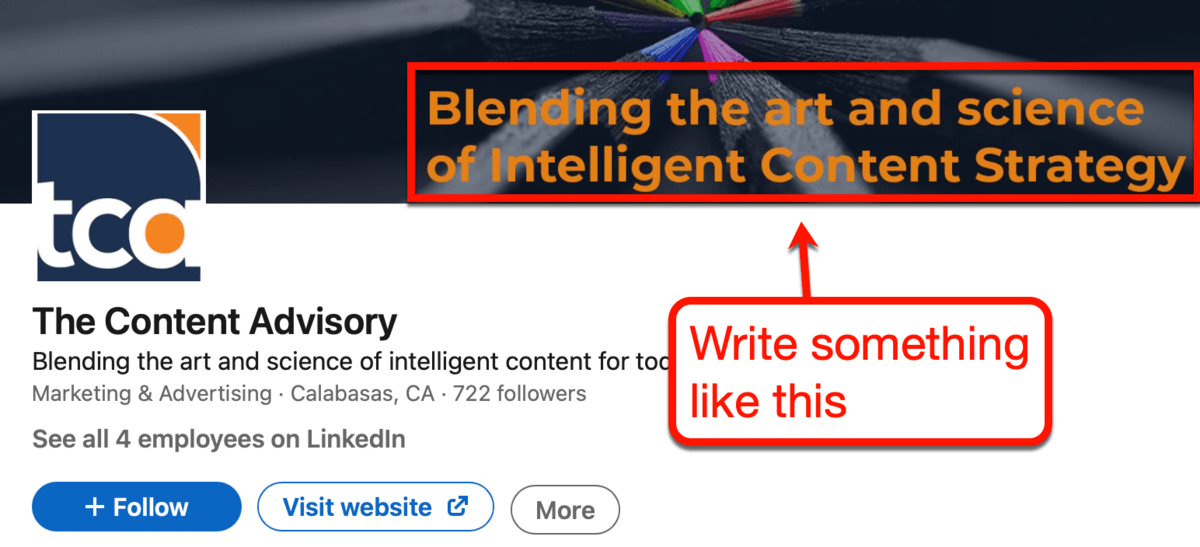
These custom background images look super sweet.
They’re also really easy to make. In fact, if you’re familiar with drag-and-drop image editing tools, you can probably whip up something eye-catching in minutes.
3. Write a compelling overview
Here’s one thing that winning LinkedIn company pages have in common: a compelling company overview.
Put simply, it’s for users who are interested in learning more about your brand.
You don’t need to write anything salesy or “clickbait-y.”
Remember, you already caught the user’s attention. Otherwise, they won’t spend time reading some random company’s overview on LinkedIn.
That said, you need to keep it simple and just describe what your blog does – in plain English.
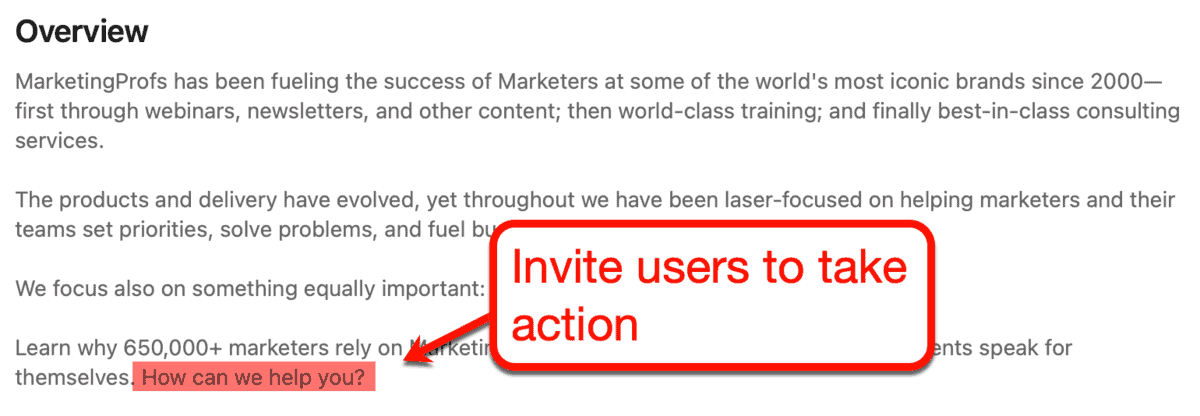
What’s important is you invite users to take action by the end of your overview.
It doesn’t have to be an actual call-to-action that’s taken right out of your website. If you want, you can inspire action by asking a question.
Websites like MarketingProfs use this approach on their LinkedIn page.
I scanned several other LinkedIn pages of popular blogs. Based on my observation, here are a few things you can try when writing your overview:
- Include numbers – LinkedIn page overviews only use plain text, making numbers stand out the most. Use them to highlight events or your brand’s accomplishments, like your blog’s founding date, subscriber count, and monthly traffic.
- Make it comprehensive – The majority of popular blogs on LinkedIn use a detailed overview on their company page. You can do the same by incorporating storytelling elements and mentioning your mission statement in your overview.
- Ask questions – You can make your overview more relatable by asking questions that your target audience also asks. Use it as a launchpad to talk about what your blog does and why.
- Lead straight to an offer – In some cases, a blog’s LinkedIn overview ends with a link to a specific landing page. You can use the same strategy to turn your LinkedIn traffic into subscribers, members, customers, or even employees.
- Don’t think about keywords – There’s no need to worry about keywords when writing your LinkedIn company page’s overview. Just focus on being genuine and giving an honest introduction of your brand and your value propositions to LinkedIn users.
4. Get those invitations out
Remember the obnoxious “follow-back” strategy on other platforms like Twitter and Instagram?
In simple terms, it involves following as many people as you can in the hope that they’ll get followed back.
While it’s clearly a spammy behavior you should avoid at all costs, this strategy works quite well on LinkedIn.
You see, everybody on LinkedIn expects to connect with others for business-related reasons.
It doesn’t matter if you’re advertising your coaching program or promoting your latest travel blog post. Plenty of LinkedIn users embrace this kind of enthusiasm when it comes to network-building.
Of course, that doesn’t mean you should send an invitation to every user you come across.
You should still focus on building quality connections – prioritizing the following:
- People you work with
- Past clients
- People you went to school with
- Friends and family
After securing those connections, you can then start connecting with other users with similar skills and within the same industry.
That’s how you can be sure that they do care about what you have to say.
To start connecting, navigate to the ‘My Network’ tab.

Right off the bat, LinkedIn will suggest some connections that can benefit your networking efforts.
You’ll find suggestions based on your location, profession, and skills.
For example, take a gander at the recommended suggestions for my dummy account:

You can send a ton of invitations before LinkedIn reminds you that you have a weekly invitation limit.
As a rule of thumb, take a break from sending invitations once you get this alert:
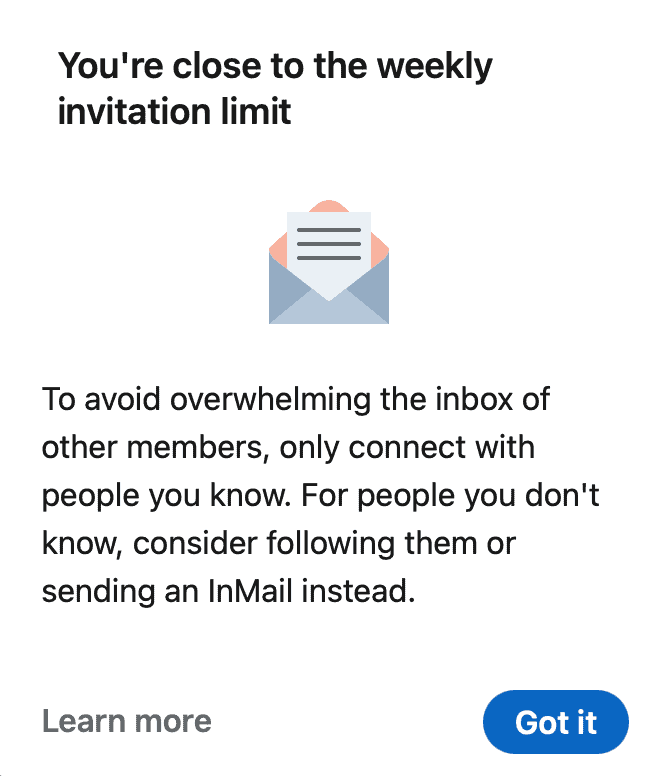
To improve the experience of LinkedIn users, everyone can only send a limited number of invites per week.
If you quickly push past 100 invites, it’ll take another week before you can send invitations again.
That’s no good.
Remember, you never know when you’ll need to send an invitation to someone important.
The weekly limit reminder should be your cue to shift your focus from quantity to quality. By that, I mean you should start communicating with the connections you have.
Spend some time writing comments, sharing posts, and leaving reactions. These will only take a couple of minutes per day, but they’ll help boost your presence greatly down the line.
5. Showcase your skills and get endorsements
One of the things that drew my attention to LinkedIn is how easy it is to get social proof.
In the world of online marketing, “social proof” is a catch-all phrase for things that prove your online reputation.
Some examples are:
- Positive customer reviews and testimonials
- Five-star ratings
- Influencer endorsements
You can read this post for a more detailed explanation of social proof and how bloggers can use it.
On LinkedIn, you can earn and showcase social proof in a handful of ways.
For new LinkedIn users, I recommend building your skills list first. That way, you can earn endorsements from other users.
Endorsements are a good indication that people are confident in your industry knowledge.
For your reference, have a look at Ann Smarty’s skills and endorsements:
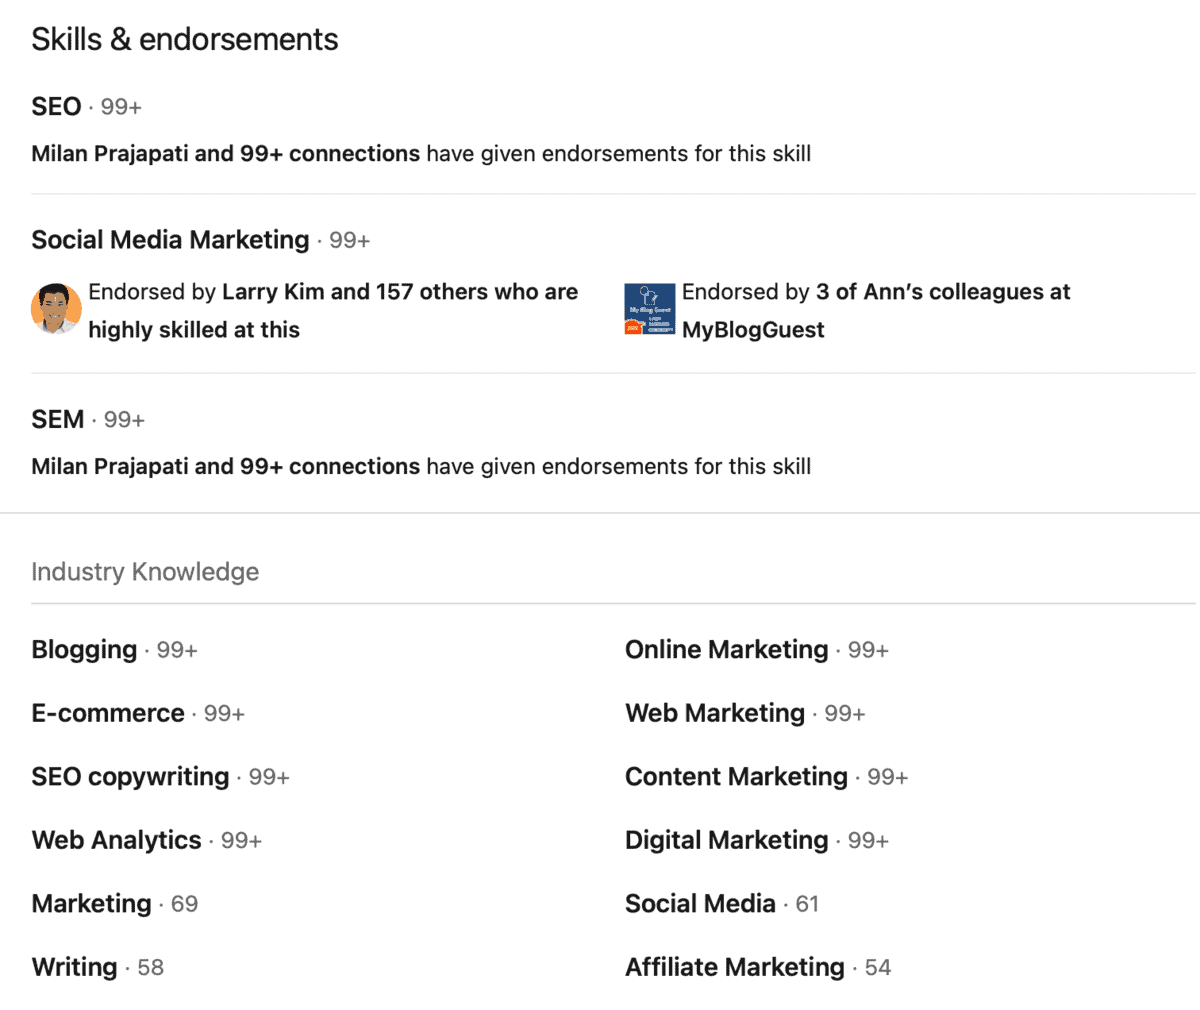
That’s the kind of profile that attracts high-quality leads through LinkedIn.
To get endorsements, you must first list down your relevant skills – stuff that your current connections already recognize you by.
If you’re building your LinkedIn profile for the first time, expand the ‘Add profile section’ drop-down menu.
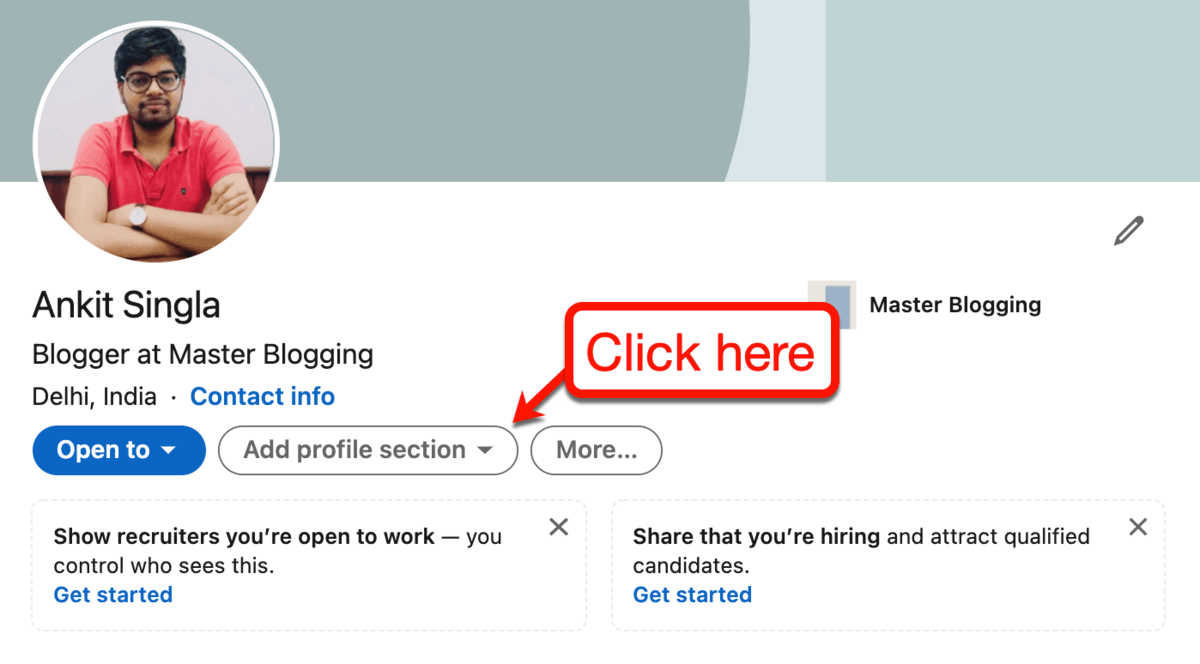
This will pull up the list of profile sections you can add to your LinkedIn profile.
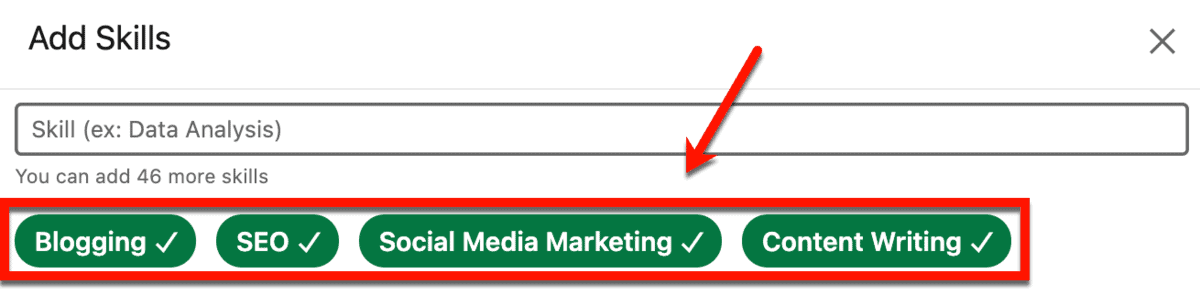
To add skills, just select ‘Skills’ and enter up to 50 skills that are relevant in your field. Take note that LinkedIn will also suggest a handful of skills based on how you set up your account.

For my dummy account, let’s add “blogging,” “SEO,” “social media marketing,” and “content writing” as my skills.
Once your skills are set, other users will now be able to endorse you for those skills.
Now – let me share with you a couple of tips on how to get those endorsements rolling in.
Start with people you personally know
An easy way to get skill endorsements is to ask for one from LinkedIn users you personally know.
Start with your list of priority connections, like past colleagues, classmates, friends – basically everyone in your personal circles.
Will it propel your LinkedIn professional profile to the top? Probably not.
However, a few skill endorsements are infinitely better than nothing. It’s a great first step towards building a presence on LinkedIn that people in your industry will respect and trust.
Endorse other users
Endorsement exchanges are proof that LinkedIn users are all about watching each other’s backs.
It’s not rocket science.
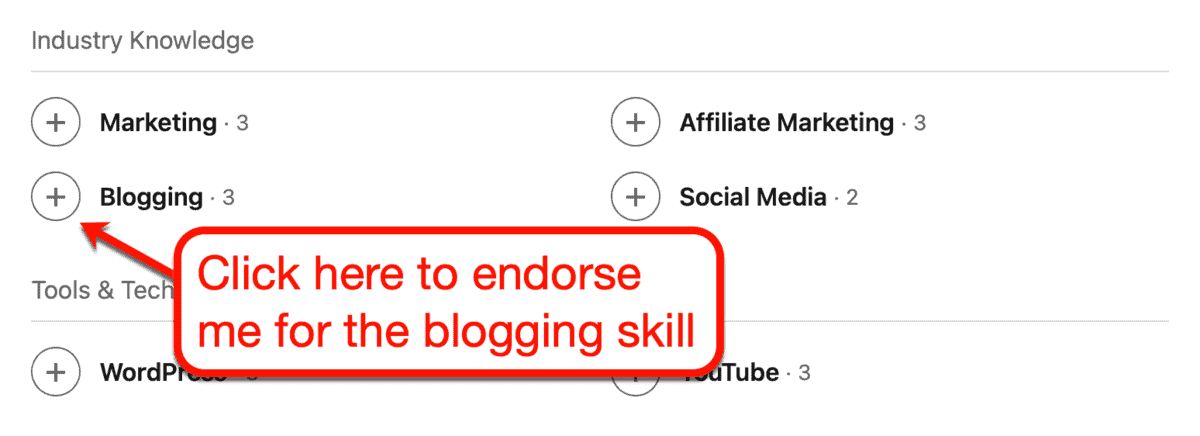
For example, let’s say you want to give me an endorsement for the “blogging” skill. Just visit my page, scroll down to “Skills & endorsements,” and click the “plus” button next to “Blogging.”
As a LinkedIn user, getting skill endorsements really puts me in a good mood. You can take advantage of that fact by asking for a skill endorsement yourself – I’ll probably return the favor.
In fact, I’ll cut you a deal right now.
Endorse any of my skills and let me know.
In exchange, I’ll endorse any of your skills. Just connect with me on LinkedIn right here to take the first step.
Whatever you do, try not to participate in mass endorsement exchanges.
Any serious LinkedIn user can tell if someone manipulated their skill endorsements. A clear red flag, for instance, is if they’re getting endorsed by people from completely unrelated fields.
Share your LinkedIn profile on other networks
You know who else could be on LinkedIn?
Four words: your social media connections.
Let’s face it, if you’re an aspiring blogger, chances are you’re pretty active on major networks like Instagram and Facebook. That means you probably already have dozens of people in your social sphere who know your professional history.
I know – you’ll probably see loads of memes about LinkedIn skill endorsements on Twitter. But there are some genuine requests that get real results.
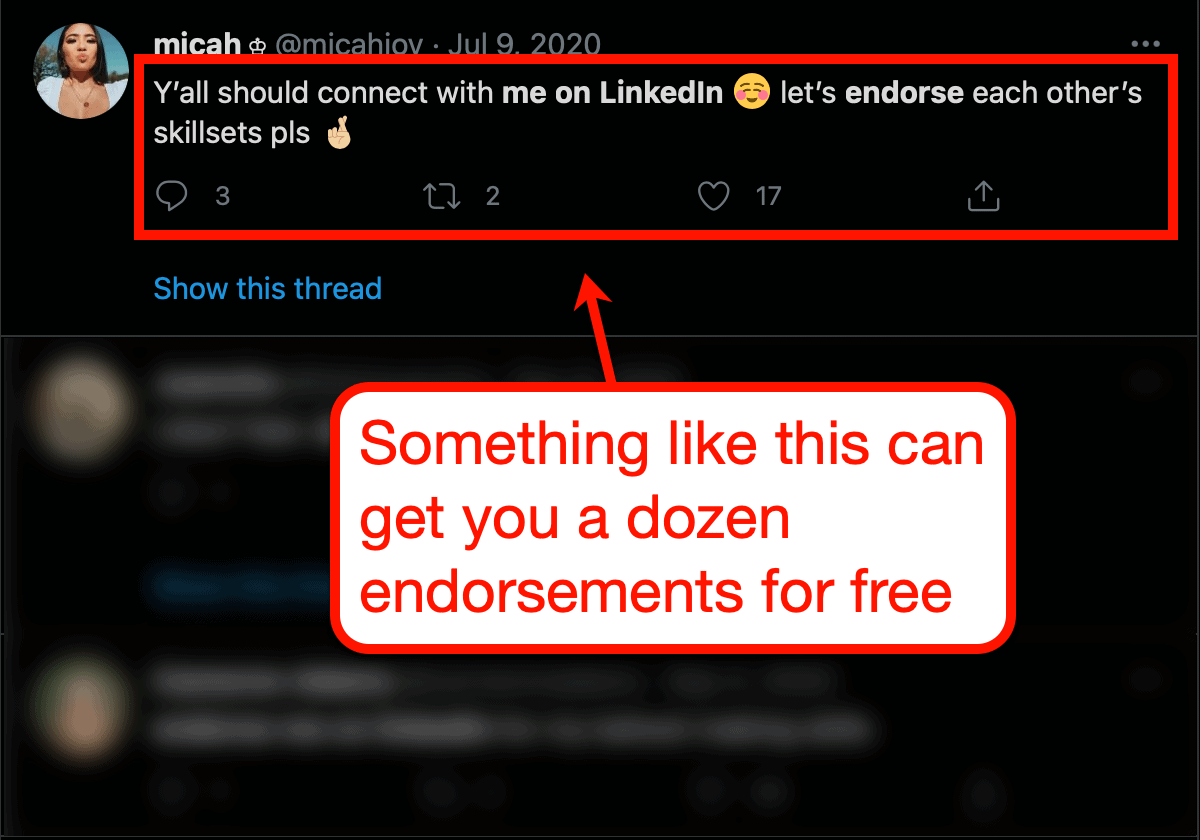
Here’s a mind-numbingly simple game plan that can get you some endorsements from day one:
- Step 1: Add a relevant skill on LinkedIn
- Step 2: Share content that highlights your expertise in said skill
- Step 3: Mention your LinkedIn profile
- Step 4: Request for a skill endorsement and promise one in return
Play the long game
Giving out endorsements is free. As such, there’s really no reason for anyone to not give you an endorsement, especially someone you’re really connected with.
With all that being said, a surefire way to get skill endorsements is to truly work on your professional relationship. Put yourself on their radar by reacting to their posts, answering their questions, giving them constructive feedback, and so on.
Once they trust you enough, asking them for a skill endorsement is almost guaranteed to work.
6. Feature your accomplishments
As fun as collecting endorsements is, it’s not the end all be all in regards to LinkedIn marketing.
There are other types of social proof that are more compelling – like your professional accomplishments.
Just like your skills, you can add your accomplishments to your LinkedIn profile from the ‘Add profile section’ drop-down menu.
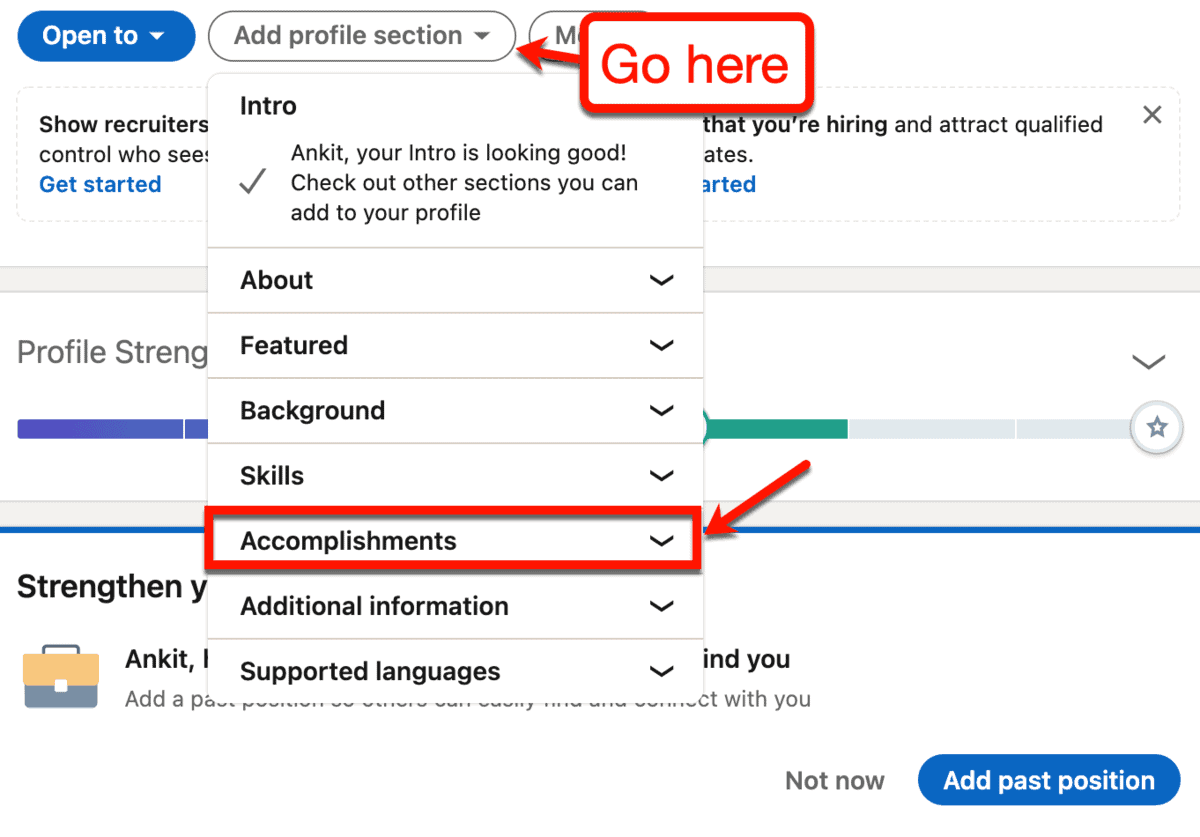
For accomplishments, LinkedIn allows users to showcase eight different types:
- Publications – Bloggers and freelance writers can feature their published works on LinkedIn as “publication” accomplishments. In addition to showing off your writing skills, adding publications will also elevate your LinkedIn profile’s authority.
- Patents – A patent is an accomplishment that only a few people will ever experience. Owning one means you or your company can make a dent in your industry, and that’s something share-worthy on LinkedIn.
- Courses – Completing courses not only proves your knowledgeability. It also exhibits your commitment and dedication to pursue professional development in any given field.
- Projects – A project is a broad term for anything you’re previously or currently working on that can be validated online. This gives prospective leads and loyal blog followers a chance to witness your work firsthand.
- Honors & awards – Earning honors and awards throughout your career will undoubtedly benefit your credibility. You can feature them on LinkedIn simply by specifying details like the award’s issuer, issue date, and brief description.
- Test scores – If you have a test score you’re particularly proud of, you can let LinkedIn users know on your profile. However, taking “skill quizzes” is a more effective method of showing off your skills.
- Languages – For writers and bloggers, it’s important to highlight your proficiency level in the language you’re using. Be honest since this is something others can easily verify on their own.
- Organizations – Being part of an organization signifies that you’re a team player. It shows that you’re willing to invest your personal time to contribute to communities within your niche.
7. Take skill quizzes
Sharing your accomplishments on LinkedIn is great and all.
But if you really want to prove that you’re among the best, you should put your skills to the test.
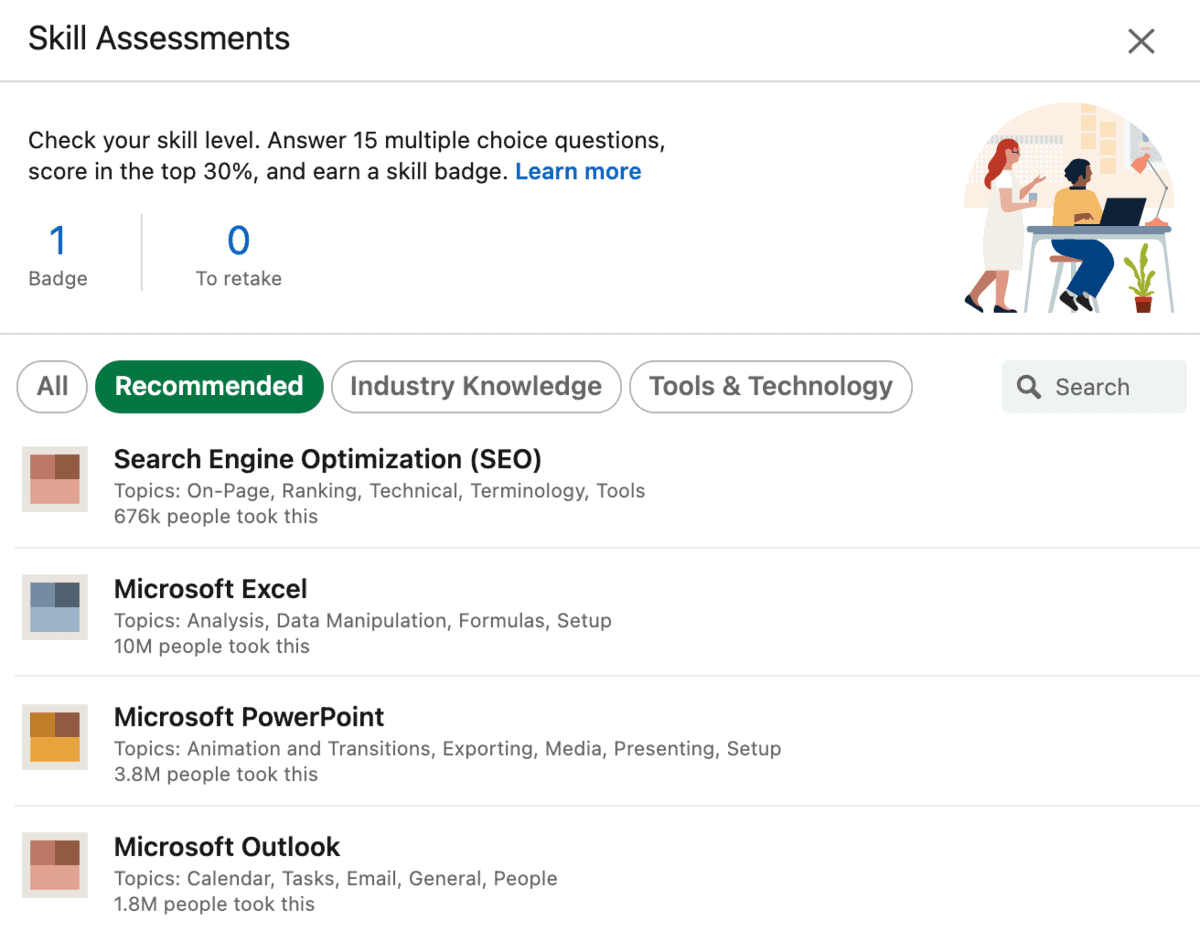
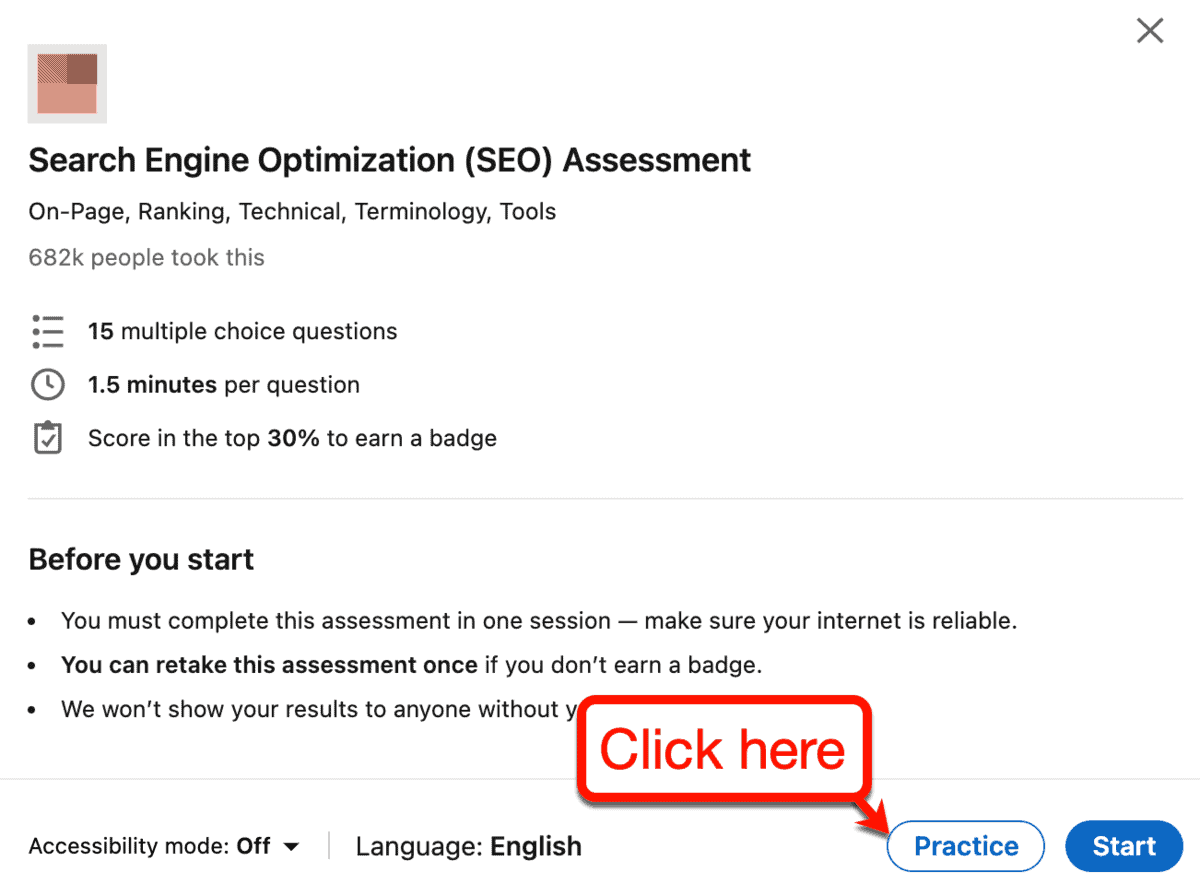
The LinkedIn Skill Assessments feature allows you to do just that.
It grants access to a bunch of “skill quizzes” that test your knowledge of your industry. If you belong in the top 30 percent, you’ll earn a badge you can show off on your LinkedIn profile.
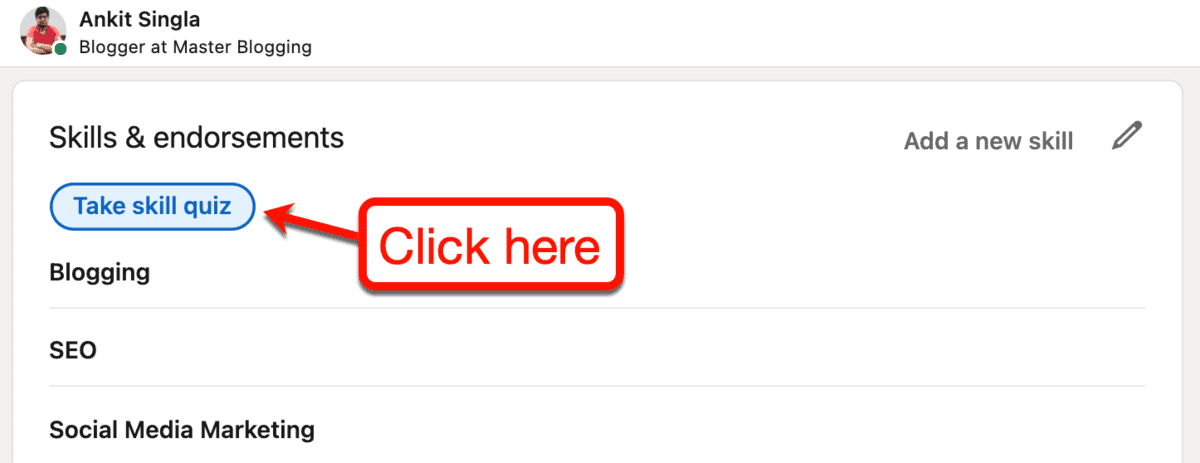
To take a skill quiz, view your profile and click ‘Take skill quiz’ under “Skills & endorsements.”
After successfully finishing a skill quiz, the skill in question should now have the LinkedIn Skill Assessment badge.
Just be sure to flip this toggle to display your shiny new badge on your LinkedIn profile:
With this enabled, LinkedIn users will now see your badge in your profile’s “Skills & endorsements” section.
Here’s what it looks like:
Now, no one will question your expertise in that skill.
Just a word of advice: LinkedIn skill assessments are harder than they sound.
The good news is, retaking skill quizzes is free. You can also run practice sessions to sharpen your knowledge before taking on the real thing.
8. Feature your latest blog posts
At this point, you’ve done nearly everything you could do to make your LinkedIn profile as appealing as possible.
It’s time to capitalize on the professional network you’ve built.
On LinkedIn, you can feature the posts, articles, links, and media you’ve shared to make them sticky.
Simply go to your profile, click ‘Add section,’ and click ‘Featured’ to see your options.
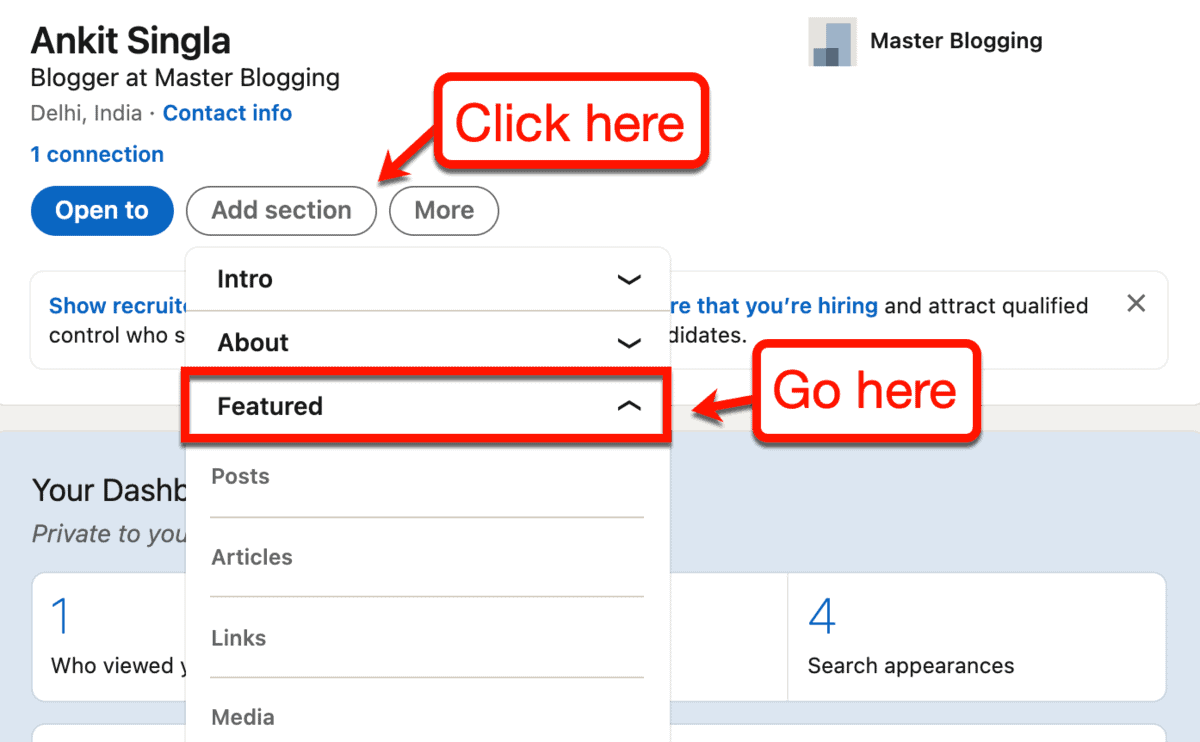
Keep in mind that the “Posts” and “Links” options can both be used to feature content from your website. The main difference is, “Posts” will only work if you’ve already shared your blog post on LinkedIn before.
If you click ‘Posts,’ LinkedIn will show you a list of all the posts you’ve shared on the website.
To feature a post, simply click the ‘Feature’ button below it.
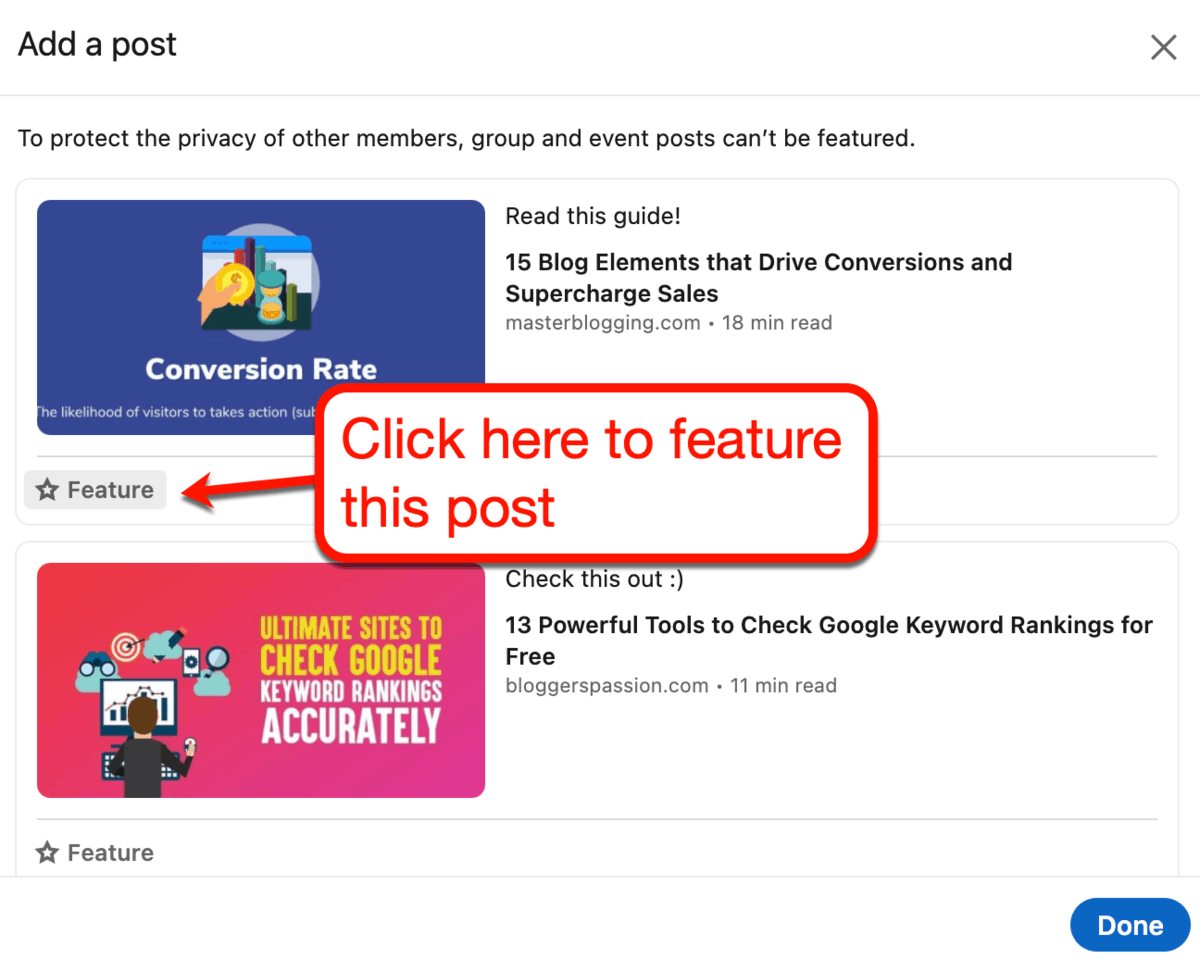
All your featured stuff will appear directly below the “About” section of your LinkedIn profile.
Use this to funnel traffic from your LinkedIn network straight to your blog. Of course, you can also feature guest posts, interview posts, and other collaborative works you’ve contributed to.
9. Join LinkedIn groups
LinkedIn is great for building your professional network and attracting quality leads to your website.
But, when it comes to spreading content, it’s just as effective as any other social network in generating traffic.
That is, if your sharing strategy only involves chucking out content on your home feed.
What you need is to join LinkedIn groups to make sure your brand is visible to the right people.
To look for groups relevant groups, the best way to start is to use the search bar. Simply type in a keyword and switch to the ‘Groups’ tab.
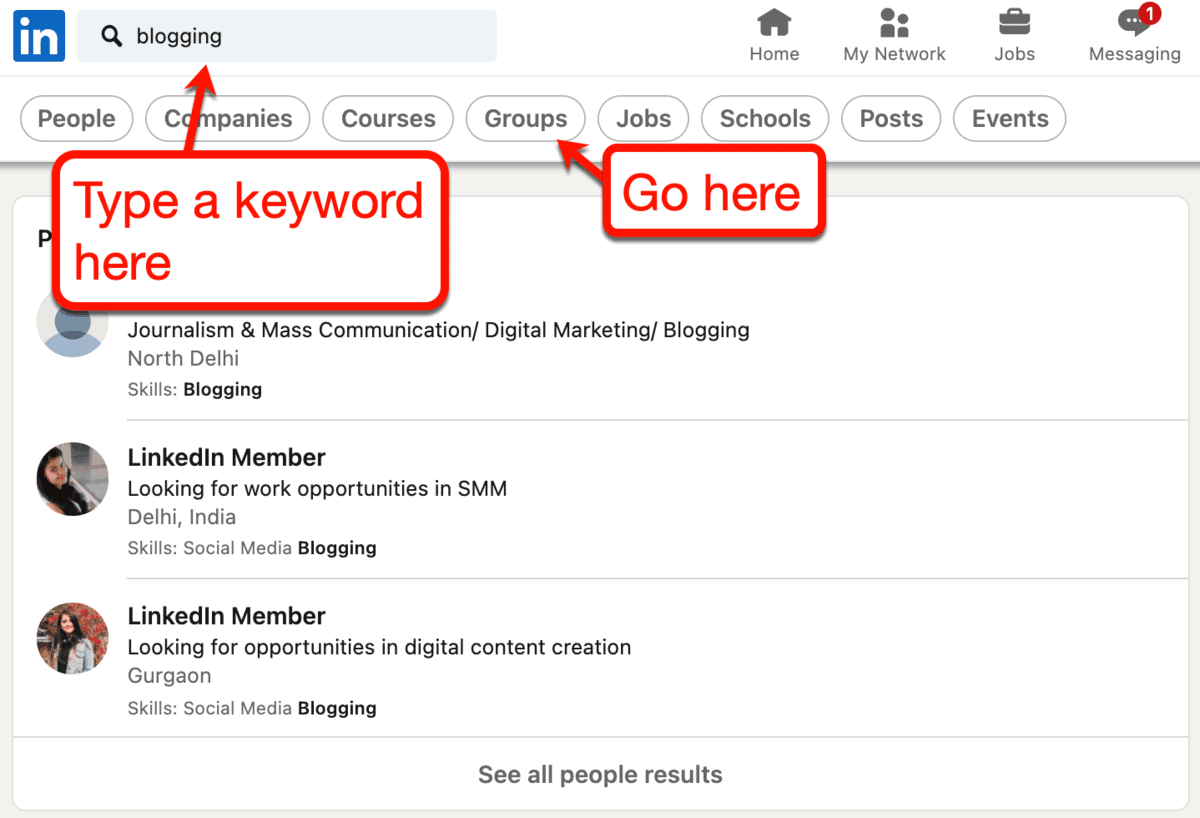
Within seconds, LinkedIn will show you a list of popular groups you can join to build your brand presence.
Groups are sorted according to their member count. They also come with short descriptions you can use to determine if they will help you reach the right people.

Another way to find groups is to go to the “Groups” page from your home feed.
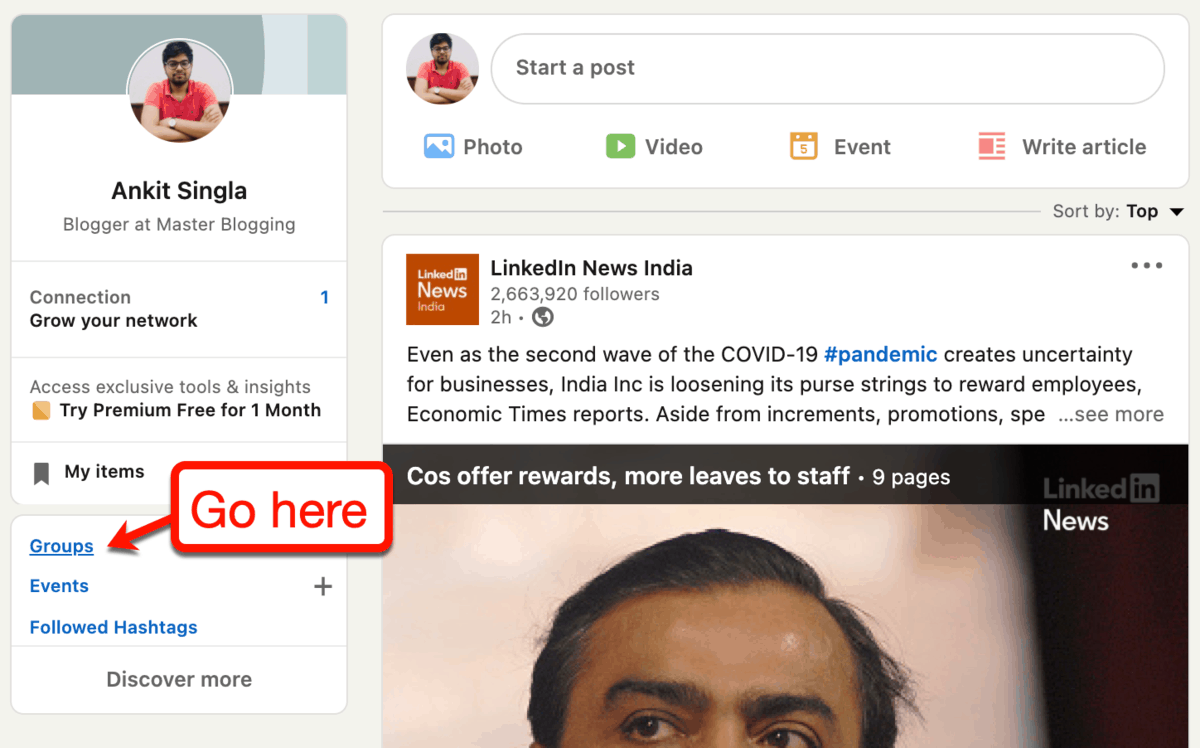
From the ‘Your groups’ tab, click ‘Discover’ to start searching for relevant groups in your industry.
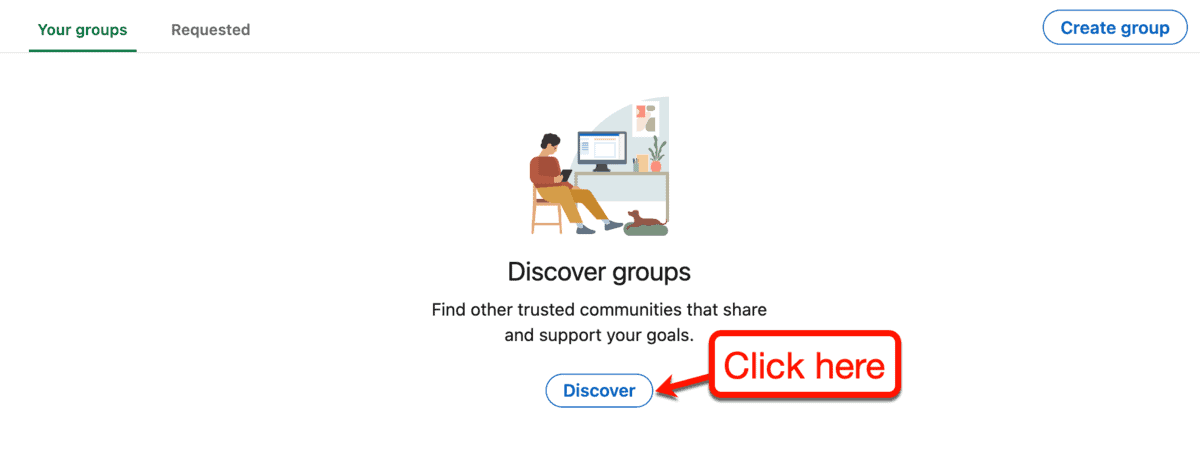
LinkedIn will then provide you with a massive list of group suggestions based on your profile.
The group discovery feature will usually suggest more groups than the search tool. However, you may find group suggestions that aren’t totally related to your specific niche.
There are just a few things you need to remember when participating in LinkedIn Groups:
- Pay attention to the group’s rules – A handful of LinkedIn groups don’t allow aggressively promotional posts, so be sure to check their “About” information. On the plus side, the majority of LinkedIn groups I’ve seen so far encourage members to share their content.
- Be a member first, blogger second – Make it your priority to be a contributing member of any LinkedIn group. Answer questions, share your thoughts, and be on the lookout for other members who may need your help.
- The goal is to win their trust – As a group member, you’re free to talk about your own blog whenever it adds value to the conversation. Just be sure you provide valuable insights without requiring them to click to your website.
10. Publish original articles
If your blog is new, you can give your brand more exposure by publishing original articles directly on LinkedIn.
LinkedIn articles will be automatically shared with your followers and professional connections. They might even get a notification as soon as you publish a new piece.
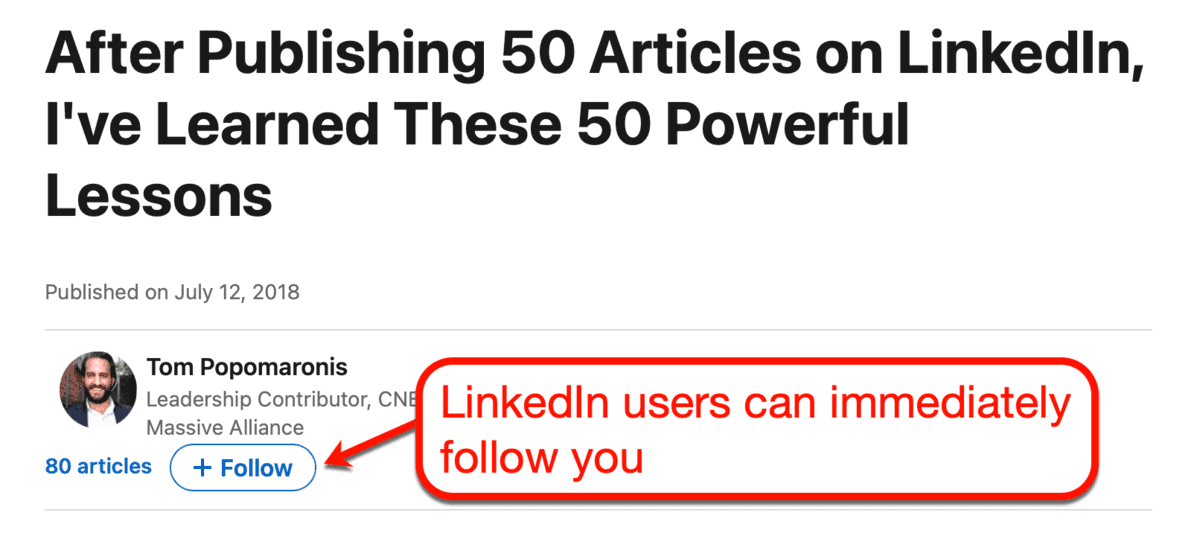
Additionally, new users who’ve never even heard of you before can follow your profile via your LinkedIn article.
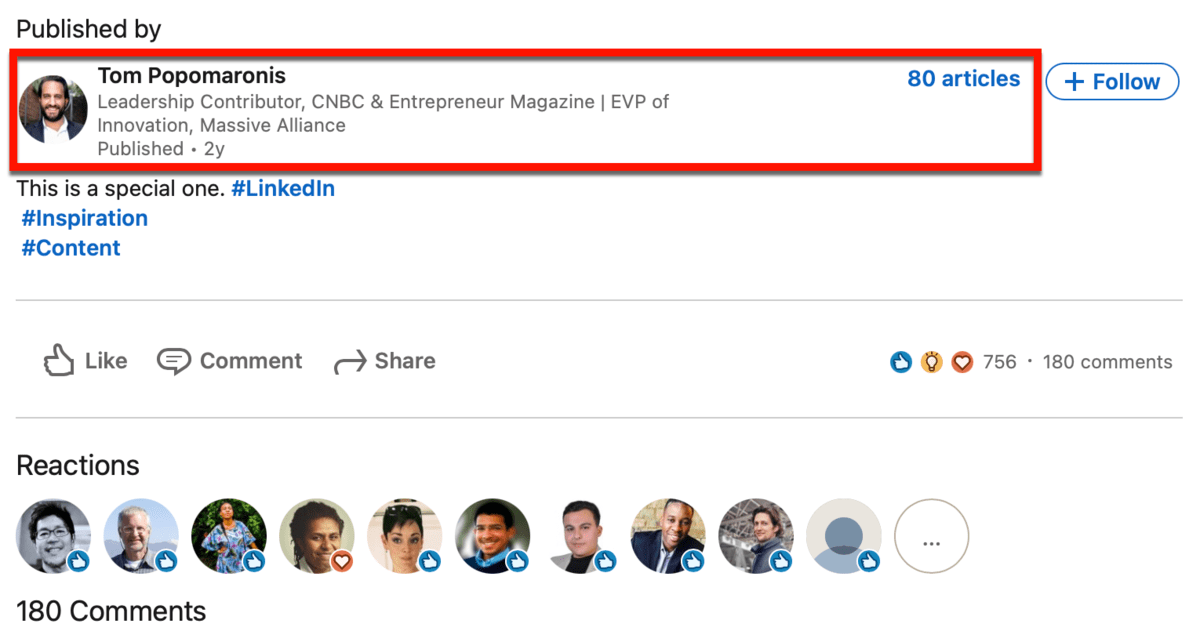
A LinkedIn article can take advantage of the platform’s user engagement features.
In addition to following you, readers can react to your post, share it, and leave comments. They can also head straight to your LinkedIn profile or browse your other submissions.
However, it’s worth mentioning that you shouldn’t expect your LinkedIn content to go viral overnight.
You need to give your LinkedIn article the care and finesse that you put into writing posts in your blog.
We’re not going to focus on the nitty-gritty of writing a stellar LinkedIn article. Instead, here are resources that can help level up your blog writing game:
- Step-By-Step Guide to Write High-Quality Content for Your Blog
- How to Write List posts that Get Thousands of Visitors
- 12 Powerful Tips on How to Write Persuasive Blog Posts
To publish a new article on LinkedIn, head to your home feed and click ‘Write article.’
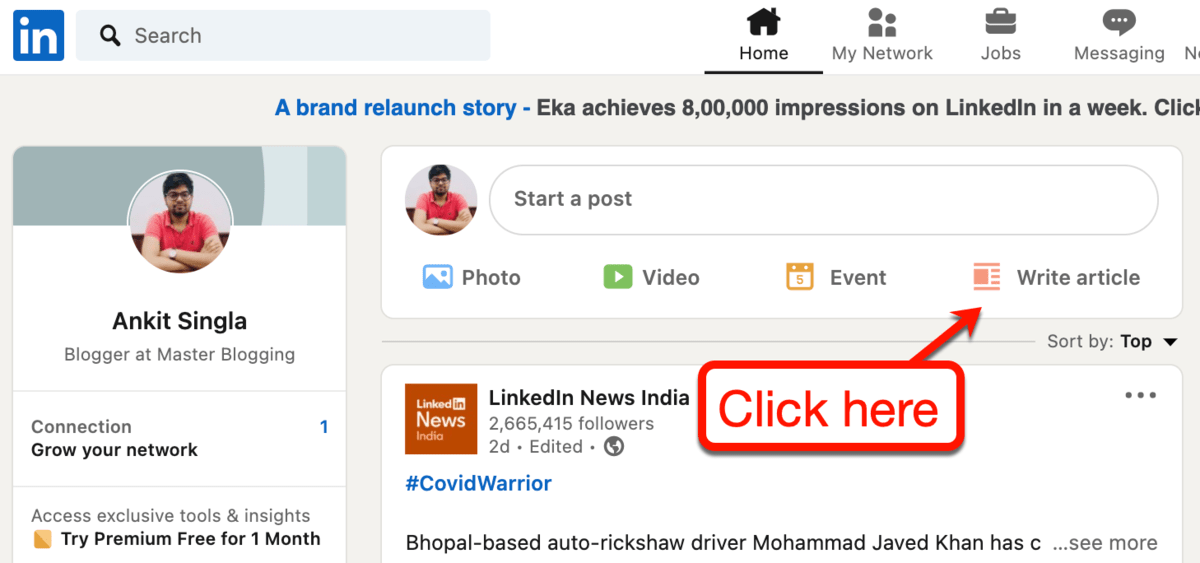
This will fire up LinkedIn’s built-in post builder.
As a lifelong WordPress user, I must say that LinkedIn’s post builder is really well-designed.
All the important text formatting tools, along with the publishing options, are neatly laid out in a compact menu bar.

Your article’s featured image and headline can also be set with just a few clicks.
But what really impressed me is the actual content editor.
Text, images, videos, slides, links, snippets of codes – everything can be added with a single click.

The experience is very similar to the Gutenberg editor. This means bloggers who use WordPress should feel right at home.
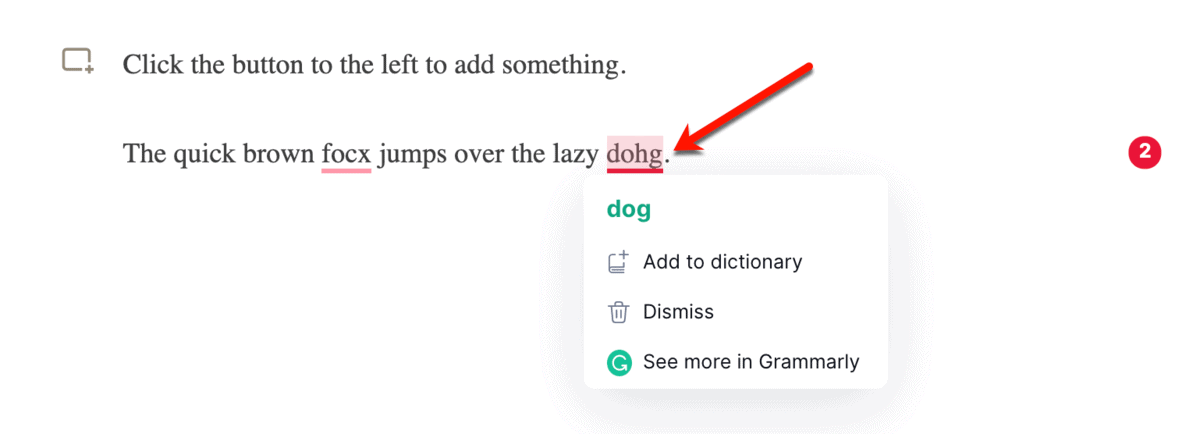
Lastly, the editor is compatible with the Grammarly extension for Chrome, allowing you to proofread your draft on the fly.
This will definitely make writing a breeze for you on LinkedIn.
11. Automate your posts on LinkedIn
Socializing and watching your network on LinkedIn may be fun.
Just don’t forget that bloggers have loads of other responsibilities – like, actually writing blog posts.
That’s why I recommend automating your posts on LinkedIn to make sure your followers get fresh content regularly.
You can do this with a tool like Social Snap, which comes with a “Social Auto-Poster” add-on for “Pro” users.
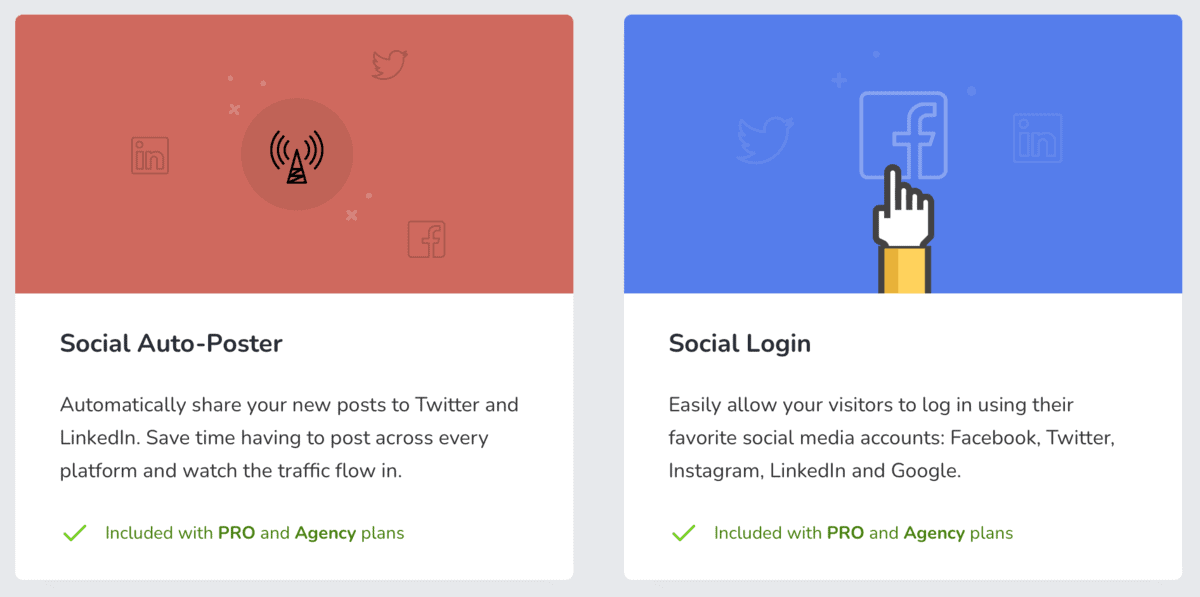
The Social Auto-Poster works by allowing you to link your social media accounts. When done, you can specify the types of posts you want to automatically share to those channels.
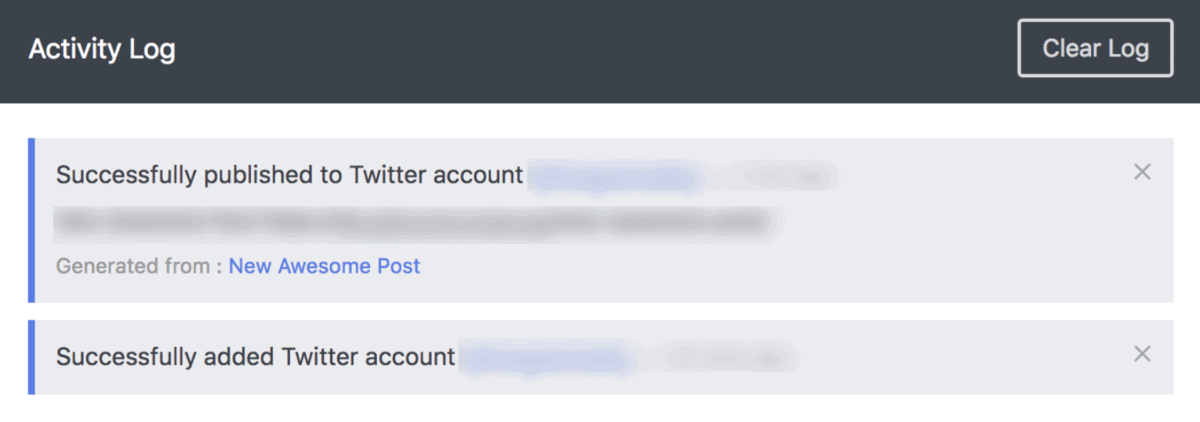
Social Snap will then record an “Activity log” you can use to verify if the Social Auto-Poster is working or not.
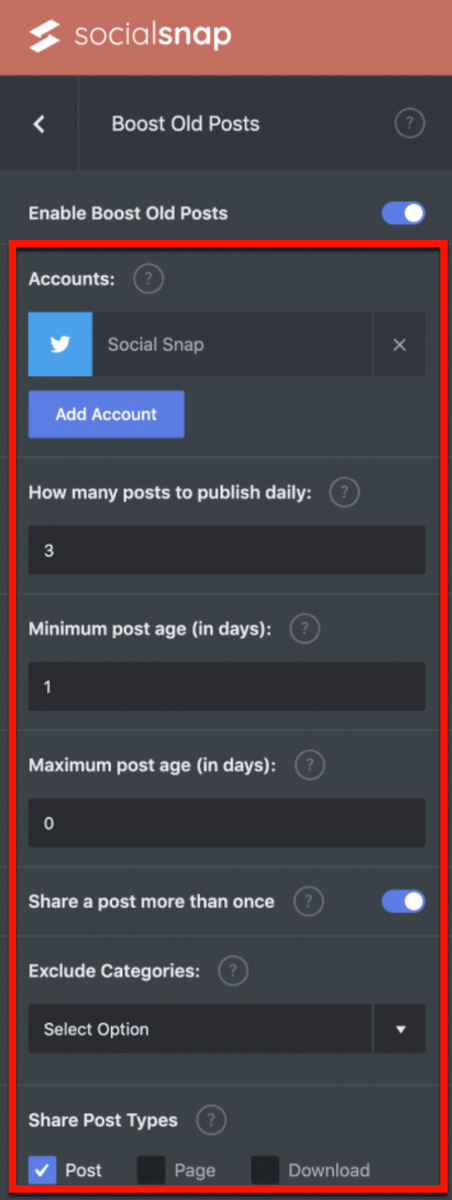
Apart from the Social Auto-Poster, Social Snap can also help you bring traffic to old posts.
The “Boost Old Posts” add-on feature works by automatically pulling content from your blog and spreading it on social media. Just set the number of posts you want to share daily, maximum post age, excluded categories, and post types.
That’s it.
Social Snap should now work in the background – automatically promoting your blog content on LinkedIn as you write them.
Just remember the following tips when using Social Snap for LinkedIn marketing:
- Set up a sharing button to LinkedIn on your blog – With Social Snap, you can easily create floating sidebars with social sharing buttons. Don’t forget to include a button that allows readers to share your content on LinkedIn.
- Specify the minimum post age for the “Boost Old Posts” tool – Make sure to set a reasonable minimum post age when boosting old posts. There’s no point in promoting content your LinkedIn followers just saw a week ago.
- Write custom post content – When using the Social Auto-Poster for individual posts, you can write something different for the post’s caption. Try to write something original, fresh, and genuinely enthusiastic when creating custom post content.
- Get 20 percent off on your Social Snap purchase – Before I forget, remember that you need a paid version of Social Snap for the key features I mentioned above. Luckily for you, there’s a 20 percent discount available for Master Blogging readers.
12. Send content updates via the messaging tool
From time to time, I receive interesting promotions – be it for content or products – in my LinkedIn inbox.
You can do the same to reach your LinkedIn connections in a more direct and personal way.
If you’d like to compose a message from scratch, start by going to the ‘Messaging’ tab.

LinkedIn allows you to specify multiple recipients using the message composer. You can also add images, attachments, GIFs, and video meeting invitations – whatever helps in conveying your message.
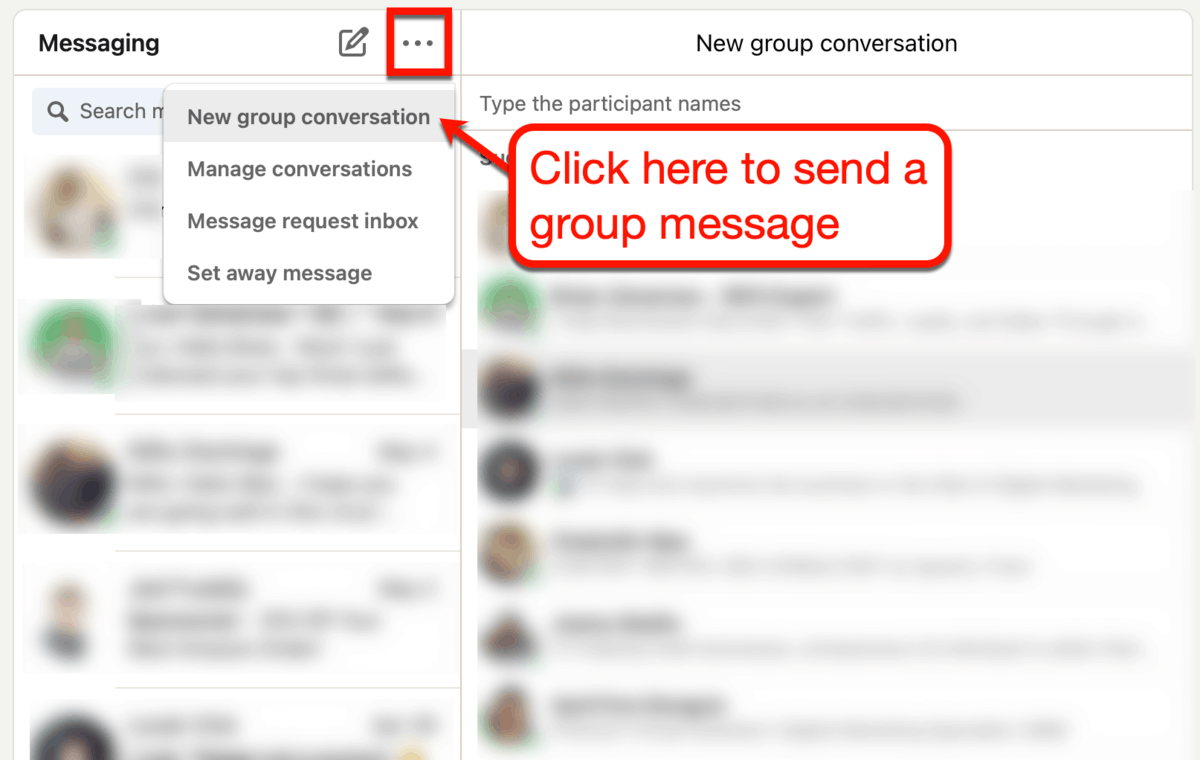
Alternatively, you can create a group conversation to give recipients a chance to chip in their thoughts.
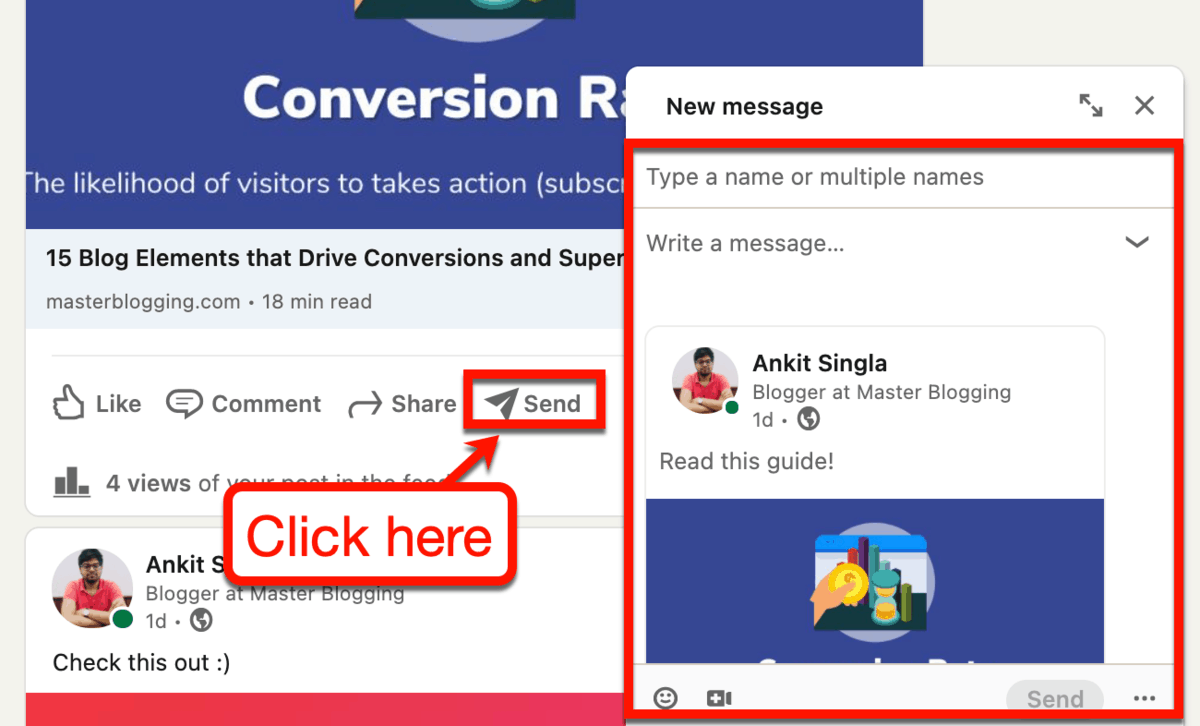
Another way to reach your LinkedIn network via messaging is by sharing one of your posts.
You can check your LinkedIn profile’s “Activity” page for a compilation of all the posts, articles, and documents you’ve shared.

After deciding which post to promote, click ‘Send’ and start composing your message.
Again, you’re free to enter multiple recipients.
Not sure what to write for your first message?
My advice is, don’t overthink it.
There’s no need to go all salesy when reaching out to your LinkedIn connections.
If you connected with individuals whom you can really help with your blog, they will definitely appreciate the content update. Just keep your message short, honest, and consistent with your blogging brand’s voice.
While you’re at it, you can invite recipients to join your mailing list if they want to receive meatier updates. Assuming, of course, you already have an email marketing platform on the ready.
Additional LinkedIn marketing tips
Phew – I think we covered a lot of ground today on LinkedIn marketing.
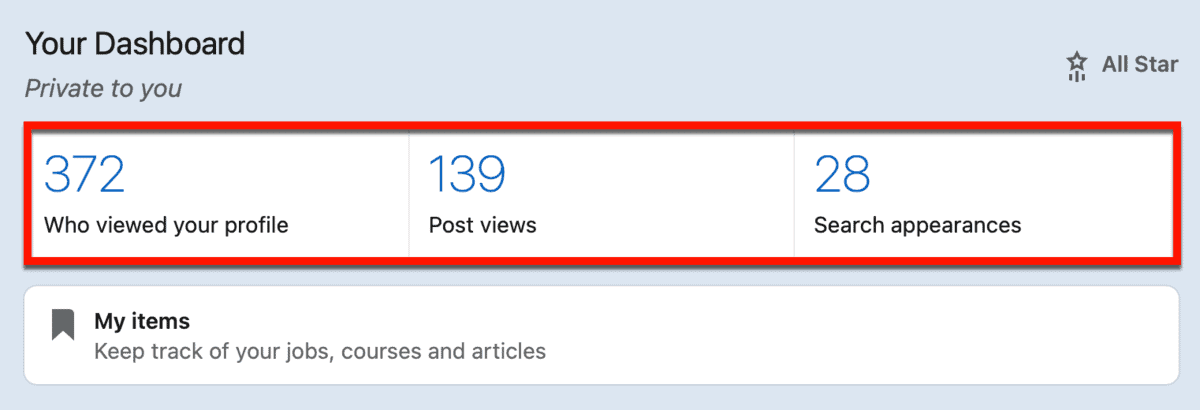
In a few days, your LinkedIn profile and posts should start getting some views.
This is something you can actually monitor on your profile’s “Dashboard” section.
Before we wrap things up, here are a few more tips that can help you build an authoritative LinkedIn profile:

- Keep connecting – By connecting, I don’t just mean inviting other users to build your network. Make it a habit to engage other people’s posts and be on the lookout for opportunities to help.
- Exchange skill endorsements – A lot of LinkedIn users practice exchanging skill endorsements to bolster each other’s profiles. You can leverage this to build social proof and rapport.
- Don’t abuse the messaging system – For me, trust is like a house of cards – it’s hard to build but easy to collapse. Never use the built-in messaging system to send spam unless you intentionally want to ruin your reputation.
- Get your interests in order – LinkedIn tailors post, connection, page, and group recommendations to your specific usage history. To maximize your experience, be sure to consistently follow relevant people, groups, pages, newsletters, and hashtags.
- Create your own group – Creating a LinkedIn group could be the next big thing in your blogging career. It sounds like a lot of work, but having an active group dedicated to your blog just screams authority.
- Create your profile in another language – With LinkedIn, you can build custom profiles that match the user’s language on demand. Use this feature if your target audience prefers consuming content in your native language.
- Consider LinkedIn ads – Just like any other social network, LinkedIn can help you gain some instant exposure for a price. LinkedIn ads can be fine-tuned to help you generate brand awareness, traffic, video views, leads, conversions, job applications, and more.
- Regularly update your contact information – In certain blog niches, LinkedIn could be the perfect way for leads to reach out to your brand. Don’t miss out on these opportunities by failing to update your contact information whenever necessary.
Conclusion
Building a solid LinkedIn presence is a great way to direct regular traffic to your blog. Done right, it will also help you build authority in your niche.
Just don’t forget to dedicate time and energy every single day to LinkedIn marketing.
It won’t propel your brand to the top overnight. In fact, it may even take days or weeks before you see consistent results from your efforts.
What I can guarantee is this:
Every minute you spend on LinkedIn will pay off.
Just follow the steps above, provide value to the community, and be patient.
For questions, suggestions, and any feedback, leave a comment below.
Good luck!
You Might Also Like:
- 7 Benefits of a Company Blog and How to do it The Right Way
- 10 Best WordPress Social Sharing Plugins
- How to Drive 50,000 Visitors Per Month to Your Blog From Pinterest
from Master Blogging https://ift.tt/3ghRnOy